
Grain can be used to add a natural and organic feel to digital videos, but how do you apply grain in Davinci Resolve?
What is Film Grain?
Film grain naturally occurs when shooting using traditional, analog film stocks and is often used to make digital video more organic and "real". Film grain is not to be mistaken for the digital gain noise that we see in digital video when shooting on high ISO values; it's something that gives your footage depth and character, when used correctly.
How to Add Film Grain in Resolve
There are two main methods of adding film grain in Davinci Resolve, and of course we cover them both in this article.
Method 1: Timeline Overlay
The Timeline Overlay method is the most familiar way of adding film grain, as it resembles the timeline workflow of other applications, like Adobe Premiere and Avid Media Composer.
To add film grain to your footage using the timeline overlay method, do the following:
- On the Media tab, import your film grain to your bin.
- On the Edit tab, drag the film grain clip to a new video track on your timeline, above the footage you want to add the film grain to.
- Select the film grain on your timeline and open the Inspector.
- In the Composite settings, set the Composite Mode to Overlay and adjust the Opacity to your liking — around 30-60 % usually looks good.
- To make the film grain longer, simply hold the Alt key and drag the film grain to the right. Repeat this step to make the grain cover your footage.
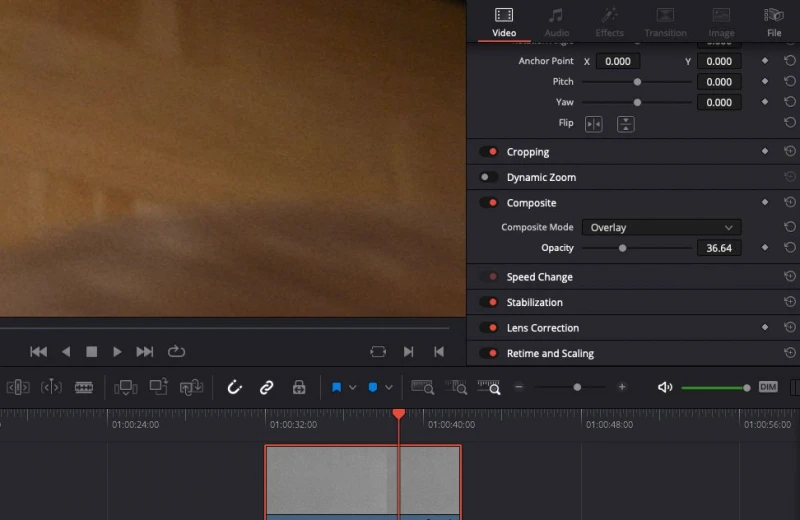
Adjusting the Overlay Opacity in the Composite settings on the Inspector tab.
Method 2: Layer Matte
The better way of applying film grain to your footage is by importing the film grain as a matte to your timeline, which makes it possible to loop the grain infinitely. This may seem as a more complicated way of doing it, and yes — while it's not as quick as slapping on the grain it allows for much more control and does not require you to manually duplicating the film grain all over your project.
To add film grain using Resolve nodes, do the following:
- On the Media tab, make sure your film grain clip is not added already. If it is added already, delete it from your project.
- Select the grain clip, right click and select Add to Media Pool as Matte. A small icon will show up on the film grain clip in your Media Pool, indicating that the clip is imported as a matte.
- On the Color tab, add a Serial node by pressing Alt+S. This will serve as your film grain master node (which is mostly a placeholder for the next node).
- Add a Layer Node by pressing Alt+L, and delete the input on the layer node by right clicking the incoming line and selecting Delete Link.
- Right click on the Layer Node and select Add Matte > Timeline Mattes > (Your film grain).
- A new Matte Node will be created next to your Layer Node. Disconnect this node by deleting the dashed line between the Matte Node and the Layer Node.
- Reconnect the Matte Node and the Layer Node by dragging the bottom output connector (green) on the Matte Node to the top input connector on the Layer Node (also green).
- On the Layer Merge Node (the node that connects the Serial and the Layer nodes), right click and select Composite Mode > Overlay.
- Adjust the intensity of the grain to your liking, by selecting the Layer Node, selecting the Key tab and adjusting the Key Output to around 0.2 - 0.3.
The final node layout will look like this:

The Resolve nodes required to overlay looped grain on top of your footage.
Resizing Film Grain in Resolve
If your film grain is not the correct size and doesn't fit your project, you can adjust the size of the grain by:
- Select the Matte Node and open the Key tab.
- Uncheck the Lock Matte checkbox.
- Adjust the Zoom value to your liking.
You can now change your film grain to your liking, without sacrificing the control you get when using the node-based approach to applying film grain in Davinci Resolve.
Want to Learn More?
If you want to learn Davinci Resolve, we have several articles covering one of the industry's most popular editing and grading softwares: